
HOW I BUILT A BALOON BOX
HOW TO THINK OUTSIDE THE BOX?
First, build it!
For some, building a box is surely what creating the wheel to our ancestors was: a grand revelation of what they are capable of achieving. For others, it is a triviality beyond compare. Whether you already know how or you feel absolutely clueless, we wanted to make it as simple and inclusive as possible because everyone needs a good box, right? Whether it will hold your most precious valuables or just a bunch of junk, we’ve got you covered.
Welcome to our ‘This is how we did it’ series, where we ask community members of MotionLab.Berlin how to create and build items that you are 100% able to recreate using our machines! For this first edition, we teamed up with none other than our expert Thibault, who kindly showed us how to build a (balloon) box.
One of the key factors to a successful product is making sure you have all the steps in mind, including asking yourself the right questions. The following steps will show you how to design a box in general.
Additionally, we’ve included an example of a box we designed so that you’re able to follow the steps. These are the supplies you need for our box:
- Material: wood, Acrylics or Medium density fibreboard (MDF)
- Wood glue
- Frame clamp
- Laser cutter
CHOOSING THE RIGHT MATERIAL
Prepare the ground
First and foremost, what are you going to use your box for? What is its purpose?
Yeah you’re right, such a basic question. Although an important one because you will have to remind yourself, throughout the whole process, to make the right decisions to achieve your wanted result. So here we go:
- What dimensions do you need?
- What tools do you have at your disposal?
- What will you store in your box?
Depending on the content of your box, all these parameters will differ. For example, if your box is going to hold moist or oily content, you should use acrylic plates instead of porous material like MDF or wood.
In our example, we are building a balloon box. For that we will need 6mm MDF, as the balloon we will store does not require the box to hold moisture or oil. The box itself doesn’t need to be watertight which makes MDF a suitable material.
DESIGNING THE BOX
This is where the fun starts. You have to decide how you want your box to look so that it fits your taste and/or the purpose you have chosen. The design of the joints is also essential for the box to hold its structure, so be mindful of the kind of joints you want to use.
- What shape have you chosen, rectangular or rounded corners?
- Flat joints, finger joints or T-slots?
Our project is a rectangular box that can hold balloon packages, either stacked on top of each other or one behind the other. We are using finger joints as they are a very steady type of joint.
EDITING THE FILE
In this step, you have to adapt the parameters to the desired speed and laser power varying on the material you chose.
In our case, we are putting the 5 faces of the box in the software that controls the machine so we can adjust the different parameters of speed and laser power that we want.
CUT BOX
Now our box is ready to be cut! We make sure the laser fits on the whole piece, now we can close it and start! Make sure you don’t leave the machine unattended in case of emergency.
ASSEMBLY
Build the piece up holding the corners with a frame clamp, or anything you have on hand to make it stick together. Glue the parts together using special wood glue and wait for a few hours until dry.
THE FINAL PRODUCT
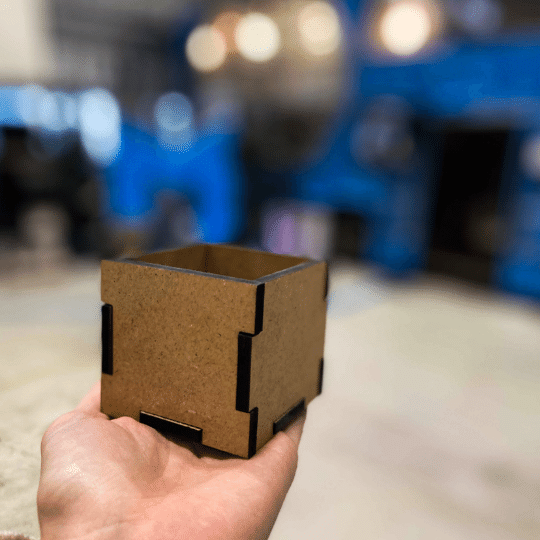
If you followed along, you should have your own box at this point. Thank you for reading through the first part of our ‘This is how we did it’ series.
If you are missing a lasercutter (or any other machine) to realize your project, make sure to sign up as a member and benefit from our 24/7 machine flatrate.
If haven’t been to MotionLab.Berlin, make sure to book a free tour first.