Welcome back to our “How I Did It” series, where community members and staff of MotionLab.Berlin talk you through the design and creation of practical do it yourself objects, which you can 100% recreate using our labs, tools and machines!
When thinking about what to write for the second part of this series, we thought of something that we believe is not talked about enough: missing parts (components). You know, when you get that amazing coffee table after being on the waiting list for 5 months, and when assembling it, you realise there is a screw or a bolt missing? Or when your do it yourself project doesn’t work exactly how you planned it, and you find yourself having to drill a bigger hole than anticipated? Yeah, we can all relate, thanks IKEA!
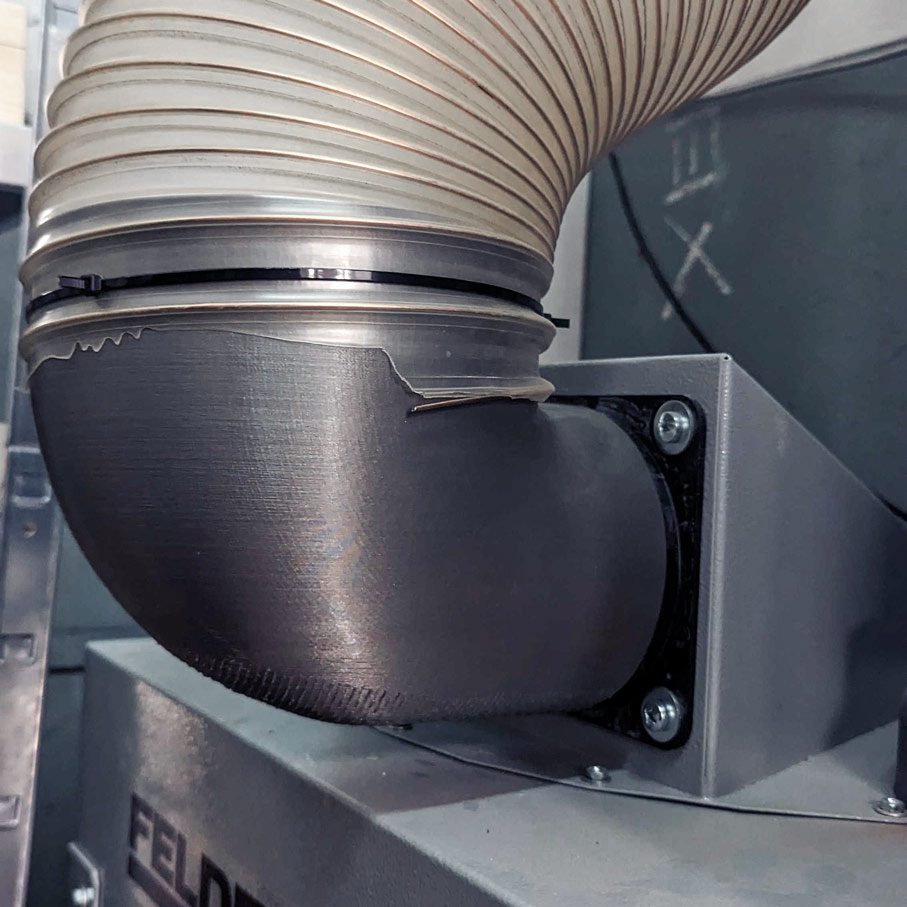
At MotionLab.Berlin, you have everything you would need to create any object, but also any component of it. In our 3D printing lab, you can design and print, then you can assemble your components in our Wood Lab (or any lab for that matter). Today, our Maker Space Manager Paul guided us through the design process of an adapter that he needed for the suction system of the Wood Lab, using Solidworks 3DExperience.
MEASURE THE DIAMETERS
Prepare the ground for your do it yourself adapter
The goal is to design an adapter between 2 different diameters with a 90° angle between them and make the air flow as smooth as possible.
The first step is to measure the diameters of each part which gets connected to the adapter. Therefore you have to make sure which one goes in and which goes on the adapter. In this case, a solid plastic connector of the suction has to slide IN the adapter on one side and a suction hose will be slid ON it on the other side. We also have to decide or measure how big the overlap on each side will be. If we’ve got the measurements we can start to design the piece and 3D print it afterwards.
There are several ways to do such a design, so the following steps are only one option! In this case we work with surfaces we’re thickening later to get a solid part which we can print. That means we design the inner shape with the according diameters. Make sure you choose the right diameters and end up with the correct measurements after thickening the piece by a previous chosen wall thickness (here 3 mm).
THE DIY DESIGN PROCESS
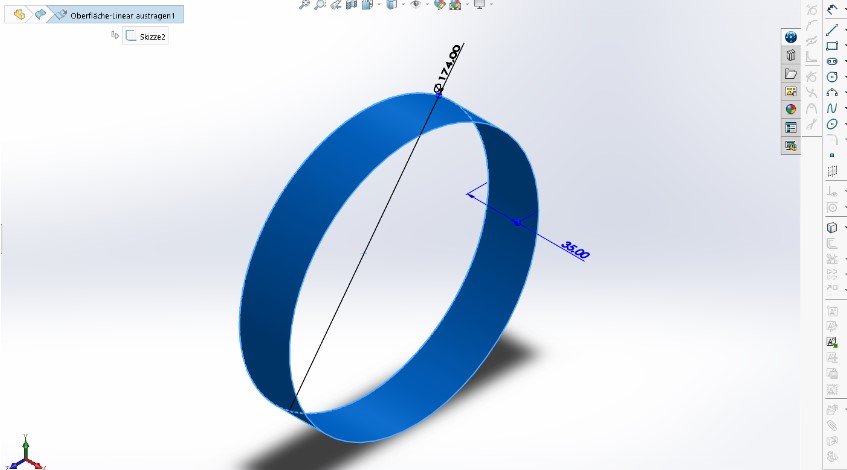
1. CIRCLE FOR THE SUCTION HOSE
Let´s start the designing prozess! First we calculated the circle diameter with a 3mm wall thickness as follows:
Extrude the circle by the required length of the overlap to get a cylindrical surface.
(P.S. Just do the CAD workshop and you won’t have to google the meaning of extrude anymore.)
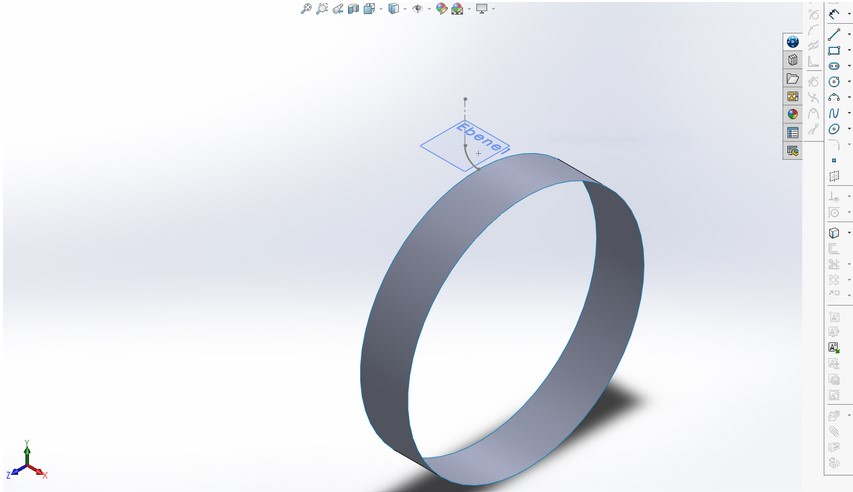
2. GUIDELINE FOR THE SMALLEST RADIUS ALONG THE 90° TURN
In the second step, you have to include guidelines for the smallest radius along the turn. Make sure the guidelines you draw are connected to the surfaces you want to combine later.
Set up a plane on the end of the guideline (#2) which is perpendicular to the already created surface.
In the second step, you have to include guidelines for the smallest radius along the turn. Make sure the guidelines you draw are connected to the surfaces you want to combine later.
Set up a plane on the end of the guideline (#2) which is perpendicular to the already created surface.
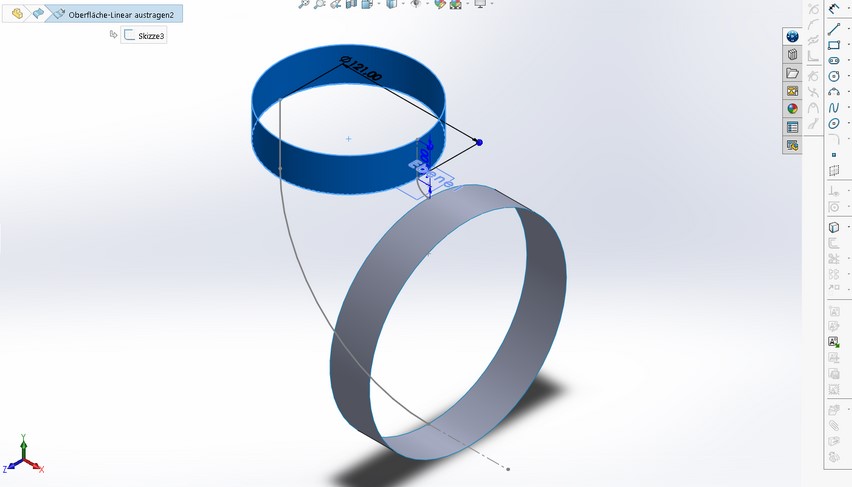
3. CIRCLE FOR THE SECOND CONNECTION OF THE ADAPTER (SUCTION)
Now you have to create a circle for the second connection of the do it yourself adapter! Since the connector is supposed to slide into the adapter at this end, this part doesn’t need to be calculated as above. Instead, it is calculated as follows:
circle diameter = measured connector diameter
Make sure the circle is connected to the guideline (step 2).
4. FINALIZE THE DESIGN
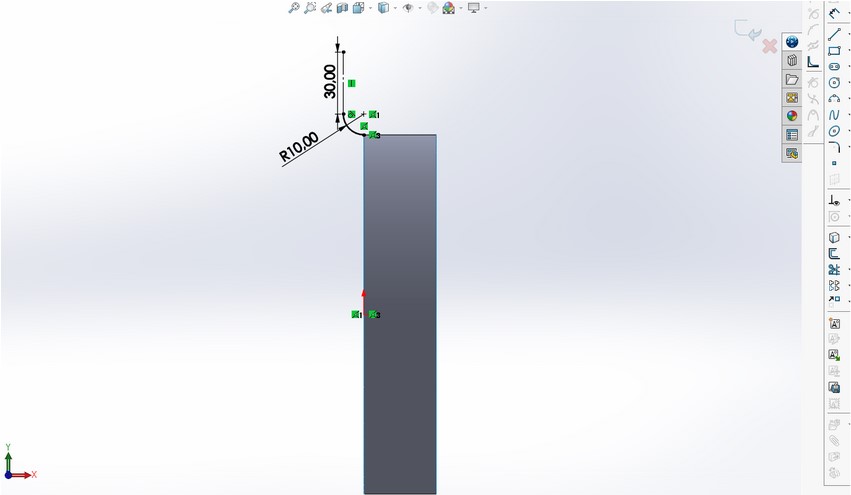
In the last step, you have to include a second guideline to make the connecting 90° surface as smooth as possible and be tangentially to the overlap surfaces on both sides. Make sure this guideline is connected to the circles / straight surfaces.
In the last step, you have to include a second guideline to make the connecting 90° surface as smooth as possible and be tangentially to the overlap surfaces on both sides. Make sure this guideline is connected to the circles / straight surfaces.
Now extrude the second circle (step 3) by the required length of the overlap to get the second cylindrical surface of your DIY adapter.
Now extrude the second circle (step 3) by the required length of the overlap to get the second cylindrical surface of your DIY adapter.
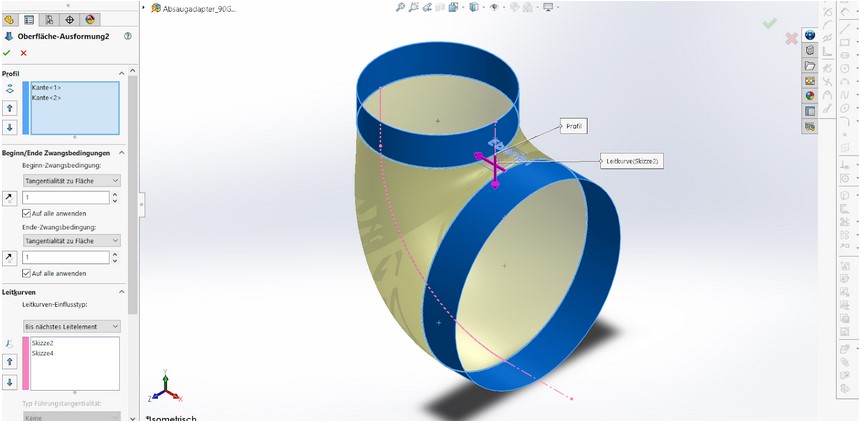
Use the function “Ausgeformte Oberfläche” / “Moulded Surface” to generate a smooth connecting surface between the two cylindrical surfaces. Use sketch 2 and 4 as guidelines.
Use the function “Ausgeformte Oberfläche” / “Moulded Surface” to generate a smooth connecting surface between the two cylindrical surfaces. Use sketch 2 and 4 as guidelines.
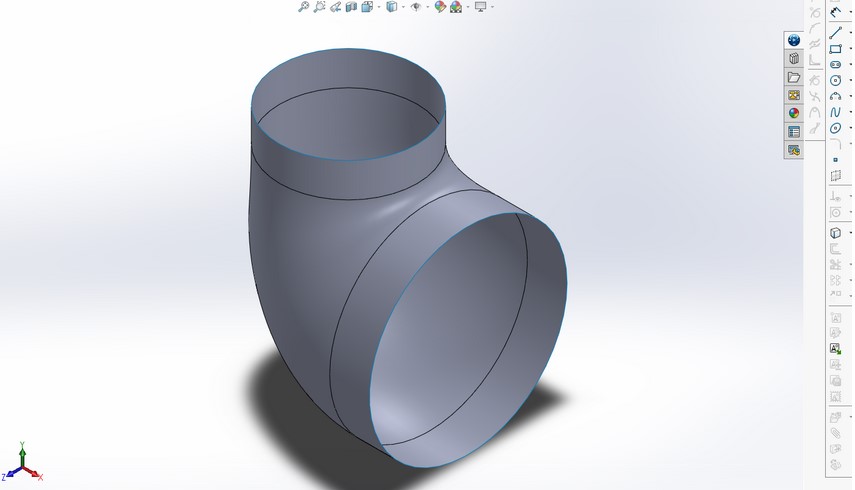
Join all of the 3 generated surfaces to be sure the next steps run as expected. The result is one smooth surface which looks like the wanted 90° adapter.
Join all of the 3 generated surfaces to be sure the next steps run as expected. The result is one smooth surface which looks like the wanted 90° adapter.
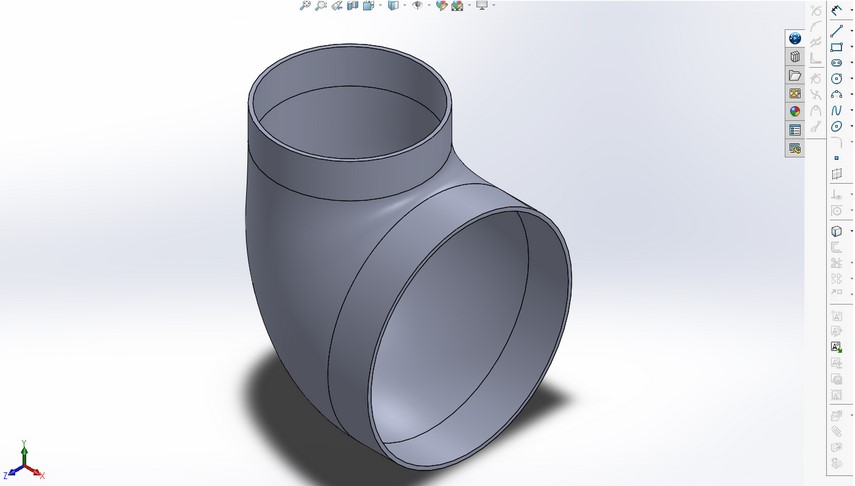
Thicken the joined surface by the predefined 3 mm to the outside to get a solid part.
Thicken the joined surface by the predefined 3 mm to the outside to get a solid part.
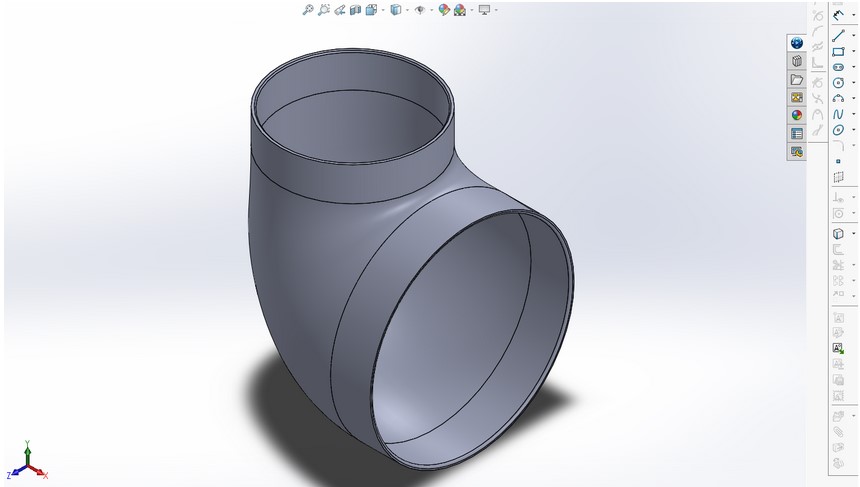
In the very last step add a little chamfer or rounded edge to facilitate the installation or avoid an “elephant foot” during the 3d printing if necessary. The finished part should look like this: a smooth transition between two diameters with a 90° turn. It is now ready to be 3D printed!
In the very last step add a little chamfer or rounded edge to facilitate the installation or avoid an “elephant foot” during the 3d printing if necessary. The finished part should look like this: a smooth transition between two diameters with a 90° turn. It is now ready to be 3D printed!
THE FINAL PRODUCT
If you followed along, you should have your own 3d printed do it yourself adapter at this point. Of course, this adapter is not only useful for a suction system in your atelier or garage, but can be used for any situation where you would need to connect two pipes.
If you are brave enough, you can even try to design and print an adapter with three hoses!
And just like that, you’re done! We hope this example of design gave you some inspiration or do it yourself idea to create your own in our 3D printing lab. Every lab is accessible through a membership, so don’t forget to find out more here if you wish to take full advantage of our tools and machinery.